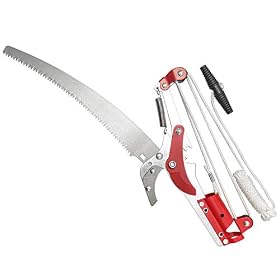
A pole hedge trimmer usually sags because the angle-lock hardware is loose, worn, damaged, or incorrectly assembled. Disconnect power, inspect the joint and locking mechanism, then tighten only as directed by the manufacturer.
A pole hedge trimmer that sags at the joint usually has a loose angle-adjustment mechanism, worn locking teeth, a damaged pivot, or a clamp that is not fully engaged. Stop using it, disconnect the battery or unplug the trimmer, and inspect the joint before trying to tighten anything. If the joint still moves under light hand pressure after correct adjustment, replace the worn part or the trimmer rather than continuing to use it overhead.
Turn off and isolate the trimmer first
Before inspecting the joint:
Release the trigger and switch the trimmer off.
Remove the battery, or unplug the tool if it is corded.
Wait for the blades to stop completely.
Keep your hands away from the cutting teeth, even when the tool is disconnected.
Support the cutting head so it cannot drop while you inspect the joint.
Do not operate the trimmer to “test” whether the joint is secure. A loose cutting head can change position unexpectedly and may contact the operator, a ladder, nearby property, or the hedge.
Check the angle lock and adjustment knob
Most pole hedge trimmers use a pivot with an angle-lock button, lever, knob, pin, or toothed indexing mechanism. If the lock is not fully engaged, the head can slowly droop under its own weight.
Look for:
A knob or lever that turns freely without tightening.
A locking button that does not return fully to its normal position.
Indexing teeth that do not line up when the head is set to an angle.
Dirt, leaves, or twigs preventing the lock from closing.
A missing washer, pin, spring, or other small hardware item.
Cracks around the pivot housing.
Clean loose debris from the outside of the joint with a dry brush. Do not force the adjustment mechanism, and do not add lubricant to a locking face unless the manufacturer specifically instructs you to do so. Oil or grease on locking teeth can make the mechanism slip.
Set the head to a supported position, then tighten or close the adjustment hardware according to the owner’s manual. Some designs require the head to be rotated until the locking pin drops into a hole or the teeth mesh completely before the knob is tightened.
Product prices and availability are accurate as of the date/time indicated and are subject to change. Any price and availability information displayed on Amazon.com at the time of purchase will apply to the purchase of this product.
Inspect for a loose pivot, clamp, or pole connection
If the angle lock appears to engage but the head still sags, inspect the joint and the nearby pole connection. A fastener may have loosened, or the pole sections may not be fully seated.
Check that:
The pivot bolt or retaining fastener is present.
The fastener is not visibly bent, stripped, or backed out.
The joint housing has no cracks or distortion.
A telescoping pole clamp is fully closed.
A threaded connection is tightened as specified by the manufacturer.
The cutting-head assembly is seated straight on the pole.
Tighten only hardware that the manufacturer identifies as user-serviceable, and use the specified method. Do not substitute a random bolt, remove safety hardware, drill a new hole, or overtighten a plastic housing. Excessive force can crack the housing or prevent the angle lock from working correctly.
Check whether the locking teeth or pin are worn
A joint can look tight while still slipping if its internal teeth, pin, spring, or mating surfaces are worn. With the battery removed or the cord unplugged, support the head and apply gentle hand pressure in the direction that normally causes it to sag.
The head should remain locked without clicking, shifting, or gradually dropping. Movement indicates that the locking mechanism is not holding securely. Do not use the trimmer if:
The head slips from one indexed position to another.
The lock releases when the pole is lightly moved.
The locking pin is rounded, bent, or fails to extend.
The teeth are visibly worn or broken.
The pivot has noticeable side-to-side play.
Some manufacturers sell a replacement pivot, lock, clamp, or complete cutting-head assembly. Use the exact part listed for the trimmer’s model and follow the service instructions. If the joint is riveted, sealed, cracked, or not intended to be disassembled, replacement of the assembly or the entire trimmer is usually safer than an improvised repair.
Make sure the problem is not excessive load or setup
A properly locked joint should not sag because the hedge is thick, but the cutting head can shift if the tool is being forced or used with an unsupported, extended pole. Reduce the load by trimming smaller sections and avoid pushing the blade into branches beyond the capacity stated in the manual.
Also check that:
The pole is assembled in the correct orientation.
Any extension section is fully inserted and locked.
The cutting head is not carrying a branch, cord, or other obstruction.
The trimmer is being held within the operating positions allowed by the manufacturer.
You are not using a non-approved extension, adapter, or replacement head.
A heavy cutting head or long extension increases leverage at the joint. It does not justify operating with a lock that slips; it only makes a weak joint more likely to move.
When to replace a part or the trimmer
A replacement joint component may be reasonable when the manufacturer provides a matching lock, pivot, clamp, or cutting-head assembly and the pole and housing are undamaged.
Replace the complete trimmer, or have it assessed by an authorized service center, when:
The pole or pivot housing is cracked.
The joint remains loose after correct adjustment.
The locking mechanism is not available as a replacement part.
The pole is bent or the head no longer aligns correctly.
Electrical wires near the joint are pinched, cut, or exposed.
The tool has been dropped or struck and its structural condition is uncertain.
The repair cost approaches that of a suitable replacement unit.
Do not weld, glue, tape, or clamp a damaged adjustable joint as a permanent fix. These repairs can fail while the trimmer is running or while the cutting head is above shoulder height.
If the joint is secure but the head still feels unstable
A secure angle joint does not eliminate normal movement from a long pole. If the joint does not slip but the entire tool feels difficult to control, use a shorter configuration when permitted, support the pole with both hands, and avoid ladders or unstable footing. For high hedges or overhead work, follow the manual’s operating guidance and use professional help when the position cannot be controlled safely.
If the trimmer makes unusual noise, vibrates excessively, smells electrical, or shows damaged wiring after the joint problem, stop using it and have it inspected. Disconnecting the power does not make damaged electrical components safe to operate after reassembly.
Why does my pole hedge trimmer head keep dropping?
The angle lock may not be fully engaged, or its knob, pin, spring, teeth, or pivot may be loose or worn. Disconnect power, clean away debris, correctly engage the lock, and check for movement under gentle hand pressure.
Can I tighten the joint on a pole hedge trimmer?
Only tighten hardware identified as user-serviceable in the owner’s manual. Do not overtighten plastic housings or replace a pivot fastener with an unapproved bolt, because the lock may fail or the housing may crack.
Is it safe to use a hedge trimmer if the joint only sags a little?
No. Any joint that changes position during light hand pressure can move unexpectedly during operation. Repair or replace the locking mechanism before using the trimmer.
Can I lubricate a slipping pole hedge trimmer joint?
Usually, lubrication will not fix a slipping lock and may make locking teeth or a friction clamp slip more easily. Clean the joint and follow the manufacturer’s lubrication instructions instead.
Should I replace the whole pole hedge trimmer?
Replacement is reasonable when the pole or joint housing is cracked, the lock is not serviceable, matching parts are unavailable, or the repair cost is close to a replacement tool. An authorized service center can assess uncertain structural or electrical damage.