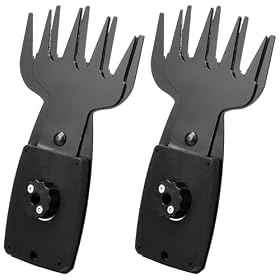
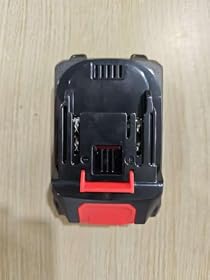
Ragged hedge tips usually mean the blades are dull, dirty, damaged, or being used on growth that is too thick. Check the blade and cutting conditions first, then inspect the power source and trimmer for deeper problems.
A hedge trimmer leaving ragged tips usually has dull or dirty blades, a damaged tooth, incorrect blade spacing, or is being pushed through branches that exceed its cutting capacity. Start by stopping the trimmer and inspecting the blades. Clean and lubricate them, check the hedge size and cutting technique, then investigate power or mechanical problems if the cuts are still poor.
1. Inspect and clean the blades
Disconnect the power before touching the cutting assembly. Remove the battery, unplug the trimmer, or follow the manufacturer's shutoff procedure for a gas model.
Look for:
Sap, dirt, leaves, or small twigs packed between the teeth
Blunt cutting edges
Bent, chipped, or broken teeth
A blade that is visibly misaligned
Excessive movement or looseness in the blade assembly
Even a thin layer of sticky sap can prevent the teeth from closing cleanly around stems. Brush away debris with a suitable cleaning brush and use only a cleaner approved by the manufacturer. Do not reach between the teeth with your fingers.
After cleaning, apply the specified hedge-trimmer blade lubricant. Lubrication reduces friction and helps the reciprocating blades move freely, but it will not restore a dull or damaged cutting edge.
2. Check whether the blades are dull or damaged
A sharp trimmer should sever suitable stems cleanly. Ragged, torn, or partially cut tips suggest that the blade edges are no longer meeting the material effectively.
Dull blades may also cause:
More vibration than usual
A slower cutting rate
The need to pass over the same section repeatedly
Leaves being pulled or shredded instead of cut
Increased strain on the motor or battery
Some blades can be professionally sharpened, while others are intended to be replaced when worn or damaged. Check the owner's manual before filing, grinding, or removing the blade. Sharpening at the wrong angle can make cutting worse and may affect the blade's clearance.
Replace the blade if it has cracked, badly bent, missing teeth, or cannot be restored according to the manufacturer's instructions. Do not try to straighten a damaged cutting bar while it is installed on the trimmer.
Product prices and availability are accurate as of the date/time indicated and are subject to change. Any price and availability information displayed on Amazon.com at the time of purchase will apply to the purchase of this product.
3. Make sure the hedge is not too thick for the trimmer
A hedge trimmer is designed for a maximum branch diameter stated by its manufacturer. That figure is a limit, not a guarantee of a clean cut in every condition. Older, hard, dry, or unusually dense growth may be difficult even when it is close to the stated capacity.
Use bypass loppers or hand pruners for branches that are too thick for the trimmer. Forcing oversized stems between the teeth can produce ragged cuts, stall the blade, and increase wear.
Blade spacing also affects performance. A trimmer with a smaller tooth gap is generally better suited to finer hedge growth, while a larger gap may handle thicker stems more effectively. The correct choice depends on the hedge and the model's specifications.
Product prices and availability are accurate as of the date/time indicated and are subject to change. Any price and availability information displayed on Amazon.com at the time of purchase will apply to the purchase of this product.
4. Improve the cutting technique
Poor technique can leave uneven or torn tips even when the blade is in good condition.
Keep the blade moving smoothly rather than stopping repeatedly inside the hedge.
Avoid twisting the blade while cutting.
Use the side or section of the blade recommended in the manual for the type of growth.
Do not force the trimmer through a branch that does not enter the teeth cleanly.
Trim small amounts progressively instead of removing a large amount of woody growth in one pass.
Keep the blade aligned with the hedge surface when making a shaping cut.
If only the ends look ragged, try a light finishing pass with a clean, lubricated blade. If the entire cut is torn or uneven, stop and inspect the equipment rather than continuing to make repeated passes.
Product prices and availability are accurate as of the date/time indicated and are subject to change. Any price and availability information displayed on Amazon.com at the time of purchase will apply to the purchase of this product.
5. Consider wet or unsuitable growth
Wet foliage can cling to the teeth and make it harder for the blades to clear each cut. Very soft, flexible shoots may also bend away from the cutting edges instead of being severed cleanly.
When practical, trim in dry conditions after the foliage has had time to dry. Clear the blade regularly if sap or leaves build up. Avoid cutting frozen growth, as brittle stems can damage the blade and produce poor results.
6. Check the blade installation and fasteners
If the blade was recently replaced, confirm that it is the correct part and is installed in the orientation specified by the manufacturer. An incorrect blade, missing spacer, or improperly tightened fastener can affect tooth clearance and movement.
With the power disconnected, check for obvious looseness in the blade assembly. Do not operate the trimmer if the blade is loose, visibly bent, cracked, or contacting the guard. Repairs involving internal blade guides, gears, or fasteners should follow the service instructions or be handled by a qualified repair professional.
7. Check power and motor performance
Power problems are less common than blade or cutting-condition problems, but a slow-moving blade can also leave ragged tips.
For a cordless trimmer:
Fully charge the battery according to its instructions.
Check that the battery is seated correctly and the contacts are clean and dry.
Try a known-compatible replacement battery if the original battery is old or cannot hold a charge.
Allow the motor and battery to cool if the tool stopped under load.
For a corded model, inspect the cord, plug, extension cord, and outlet for damage. Use an extension cord that meets the manufacturer's requirements. Do not use the trimmer if the cord or plug is damaged.
For a gas model, follow the manufacturer's instructions for fuel, air filter, spark plug, and starting-system checks. Persistent loss of power, unusual noise, burning smells, or excessive vibration requires service rather than continued use.
When to sharpen, replace, or repair the trimmer
Sharpen or service the blade when the teeth are uniformly dull but otherwise straight and intact, and the manufacturer permits that procedure. Replace the blade when it is chipped, bent, cracked, badly worn, or still produces torn cuts after correct cleaning and sharpening.
A replacement trimmer may be more practical when the cutting assembly is no longer supported, replacement parts cost nearly as much as a suitable new tool, or the motor, gearbox, and blade all show significant wear. Choose a model with a blade gap and power source suited to the hedge rather than selecting by blade length alone.
Stop using the trimmer and arrange qualified service if it vibrates severely, makes grinding or clicking noises, overheats, has exposed electrical damage, or continues cutting poorly with a clean, correctly installed blade.
FAQ
Why is my hedge trimmer cutting but leaving torn leaves?
The blades may be dull, dirty, damaged, or poorly lubricated. Wet foliage, flexible shoots, and branches that are too thick for the blade gap can also be pulled and torn instead of cut cleanly.
Can I sharpen hedge trimmer blades myself?
Only if the manufacturer's instructions allow it and you can maintain the specified cutting angle and tooth clearance. Otherwise, use a qualified sharpening service or replace the blade.
Does blade length affect ragged cuts?
Blade length mainly affects coverage and handling. Ragged cuts are more directly related to blade sharpness, tooth spacing, blade condition, cutting technique, and whether the hedge is within the trimmer's capacity.
Should I use a hedge trimmer on thick branches?
Use the trimmer only within its stated maximum cutting diameter. Cut thicker branches with bypass loppers or a pruning saw to avoid tearing the hedge and overloading the tool.