Oiling hedge trimmer blades takes only a few minutes, but the trimmer must be switched off and disconnected from power first. Clean sap, dirt, and plant debris from the blades, apply a light coat of the lubricant specified in the owner's manual, and run the trimmer briefly only after the lubricant has been applied safely.
Maintenance · Mon Sep 07
How to Oil Hedge Trimmer Blades
Oil hedge trimmer blades after cleaning to reduce friction, help prevent corrosion, and keep cutting action smooth. Follow these safe steps and use the lubricant recommended by the manufacturer.
What you need
- The hedge trimmer's recommended blade lubricant
- A clean rag or shop towel
- A soft brush for dry debris
- Protective gloves
- Eye protection when brushing or cleaning the blades
Use a purpose-made hedge trimmer or power-tool blade lubricant when possible. Some manufacturers specify a particular oil or spray, while others prohibit certain products. Check the manual before using penetrating oil, motor oil, chain oil, or household lubricants. Avoid products that can damage plastic parts, attract excessive dust, or leave a heavy sticky film.
Blade lubricant
 Pruner Lubricant, Hedge Trimmer Oil for Blades, Pruning Shears Oil, 1 fl ozDreyoo
$12.99 as of
View on Amazon Supreme Trimmer Hair Clipper & Trimmer Blade Lubricating Oil 4 oz STO710Supreme Trimmer
$5.99 as of
View on Amazon Gear Box Grease for Brushcutters, Trimmers and Hedge Trimmers Compatible with Stihl Compatible with HusqvarnaPARTSDEPOT
$13.50 as of
View on Amazon
Product prices and availability are accurate as of the date/time indicated and are subject to change. Any price and availability information displayed on Amazon.com at the time of purchase will apply to the purchase of this product.
How to oil hedge trimmer blades
1. Disconnect the trimmer from power
Turn the trimmer off and wait for the blades to stop completely. Then:
- Unplug a corded trimmer.
- Remove the battery from a cordless trimmer.
- Stop the engine and disconnect the spark-plug boot on a gas-powered model, following the manufacturer's instructions.
Engage the blade lock or cover the cutting teeth with the supplied blade sheath if the design allows it. Keep your hands away from the cutting edges even when the trimmer is disconnected.
2. Brush away loose debris
With gloves on, use a soft brush to remove leaves, small twigs, and dry dirt from between the teeth. Do not use your fingers to clear debris. A brush is safer and less likely to snag on the blade.
3. Wipe off sap and residue
Dampen a rag with the cleaner recommended by the manufacturer and wipe along the blade rails and teeth. Sticky sap can prevent the blades from sliding freely and can hold abrasive dirt against the metal.
Do not spray cleaner directly into the motor housing, battery compartment, switch, or ventilation openings. If the blades are wet after cleaning, dry them before applying oil.
4. Apply a thin coat of lubricant
Apply a small amount of blade lubricant along the cutting surfaces and the areas where the blades slide against each other. Follow the product instructions for spray distance and application method.
A light, even film is enough. Excess oil can drip into the housing, collect dust, or spray onto nearby surfaces when the blades move. If using an aerosol, spray onto a rag first when practical, then wipe the rag over the blade surfaces. This gives you more control and reduces overspray.
5. Move the blades only when safe
Some manuals recommend briefly operating the trimmer after lubrication so the oil spreads across the sliding surfaces. If your manual gives this instruction, reinstall the battery or reconnect power only after the blade area is clear, the blade sheath is removed, and the trimmer is held in a safe position away from people and objects.
Run it for only the specified short interval, then disconnect power again and wipe away excess lubricant. Never hold the blades while they are moving or attempt to lubricate a running trimmer by hand.
6. Store the trimmer with the blade sheath fitted
After wiping away excess oil, install the blade sheath if one was supplied. Store the trimmer in a dry place where the blades will not contact soil, moisture, or other tools. A thin protective film helps reduce corrosion, especially during longer storage periods.
Replacement blades
 Black & Decker OEM N815256 Hedge Trimmer Blade Assembly DCHT820P1 DCHT820BBLACK+DECKER
$76.80 as of
View on Amazon For DeWalt N815256 Replacement Hedge Trimmer Blade Assembly DCHT820B DCHT820P1ADPIU
$129.70 as of
View on Amazon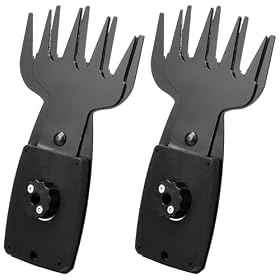 2 Pack 302348001 Hedge Trimmer Grass Shear Blade AssemblyBERPSE
$28.99 as of
View on Amazon
Product prices and availability are accurate as of the date/time indicated and are subject to change. Any price and availability information displayed on Amazon.com at the time of purchase will apply to the purchase of this product.
How often should you oil hedge trimmer blades?
Oil the blades:
- Before or after each substantial trimming session, if the manufacturer's manual recommends frequent lubrication
- After cleaning sap or moisture from the blades
- Before storing the trimmer for an extended period
- Whenever the blades begin to sound dry, drag, or move less smoothly
Heavy use in resinous hedges may require more frequent cleaning and lubrication than occasional light trimming. Do not use lubrication as a substitute for sharpening. Oil reduces friction, but it will not restore a blade that is dull, bent, chipped, or damaged.
Should you oil the blades before or after trimming?
Either approach can be appropriate, depending on the manual. Oiling after trimming removes residue and leaves the blades protected during storage. Oiling shortly before trimming can reduce initial friction, but excess lubricant may transfer to foliage and attract debris.
For many users, cleaning and lightly oiling after use is the simplest routine. If you apply oil before cutting, wipe off any excess and follow the manufacturer's guidance.
What if the blades still stick after oiling?
If the blades remain slow, noisy, or uneven after cleaning and lubrication, check these causes in order:
- Sap or compacted debris: Clean between the teeth and along the blade rails again. Hardened resin may need the manufacturer-approved cleaner and more dwell time.
- Dull or damaged blades: Nicks, bent teeth, and excessive dullness can increase resistance. Have the blades sharpened if the manual permits it, or replace the blade assembly when damage is significant.
- Loose or incorrectly adjusted fasteners: Do not adjust blade tension unless the manual explains the procedure. An incorrect adjustment can create drag or an unsafe cutting condition.
- Foreign material in the drive area: Disconnect power and inspect only the accessible areas described in the manual. Do not remove motor covers unless you are qualified and the manufacturer permits service.
- Motor, gearbox, or electrical fault: A burning smell, smoke, unusual grinding, repeated shutdowns, or a motor that struggles with clean blades requires service. Stop using the trimmer and contact the manufacturer or a qualified repair professional.
Common oiling mistakes to avoid
Using too much oil
A flooded blade does not work better. Excess oil attracts dust and clippings and can migrate into the tool. Apply a thin film and wipe off the surplus.
Lubricating without cleaning
Oil can trap abrasive grit against the sliding blades. Brush and wipe away debris first, then lubricate.
Spraying into the trimmer body
Keep lubricant away from the motor, controls, battery contacts, and ventilation openings unless the manual specifically directs otherwise.
Ignoring a damaged blade
Lubricant cannot correct a bent blade, cracked component, missing fastener, or badly worn cutting surface. Replace damaged parts with the correct manufacturer-approved component or have the trimmer inspected.
Forgetting the power source
Removing the battery or unplugging the cord is essential. Turning off the switch alone is not enough protection while cleaning or oiling.
When to replace the blade instead of oiling it
A replacement blade or blade assembly is the reasonable next step when the cutting teeth are cracked, bent, severely chipped, or too worn to sharpen safely. Use the exact replacement specified for your trimmer's make and model; blade length, tooth spacing, mounting points, and drive compatibility are not universal.
If the blade is sound but the trimmer still binds after thorough cleaning and correct lubrication, stop using it and arrange service. Continuing to operate a trimmer with excessive drag can place additional strain on the motor, gearbox, battery, or electrical system.
FAQ
What is the best oil for hedge trimmer blades?
Use the blade lubricant specified in the hedge trimmer's owner's manual. Many tools accept a purpose-made power-tool or hedge-trimmer blade lubricant, but the manufacturer's instructions take priority over general oiling advice.
Can I use WD-40 to oil hedge trimmer blades?
Do not assume a general-purpose penetrating spray is the correct long-term lubricant. Check the manual and product label first. If the manufacturer calls for a dedicated blade oil or lubricant, use that instead.
How often should hedge trimmer blades be lubricated?
Follow the manual, but many trimmers benefit from cleaning and light lubrication after substantial use, after removing sticky sap, and before extended storage. Frequent trimming in resinous hedges may require more attention.
Should hedge trimmer blades be sharp or lubricated?
They need both. Lubrication reduces friction and helps protect the blade, while sharpening restores the cutting edge. Oil will not fix dull, bent, chipped, or damaged teeth.