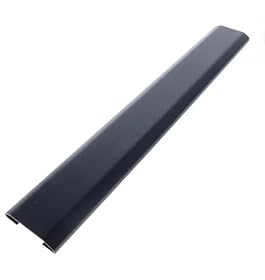
Light surface rust on hedge trimmer blades may be removable, but deep pitting, damaged teeth, or stiff movement can make replacement the safer choice. Follow these inspection, cleaning, lubrication, and storage steps.
Rust on hedge trimmer blades after storage is usually caused by moisture, condensation, plant residue, or storage without protective oil. Light surface rust can often be cleaned, but do not run the trimmer until the blades move freely and you have checked for pitting, bent teeth, loose fasteners, or other damage.
Make the trimmer safe first
Before inspecting or cleaning the blades:
Turn the trimmer off.
Unplug a corded model or remove its battery.
Wait for all moving parts to stop.
Wear work gloves and eye protection.
Keep your fingers away from the cutting edges.
Follow the manufacturer’s instructions for blade removal, adjustment, and approved lubricants. If the trimmer has been exposed to water, has damaged wiring, or shows electrical corrosion, have it inspected by a qualified repair professional before use.
Check how serious the rust is
Wipe loose dirt and plant material from the blade assembly so you can inspect the metal. Surface rust usually appears as a thin orange or brown film. It may be treatable if the teeth remain sharp, straight, and securely attached.
Replacement is generally the safer option when you find:
Deep pits or holes in the blade surface
Cracks, bends, or broken teeth
A blade that remains stuck after cleaning
Excessive side-to-side movement
Damaged blade fasteners or spacers
Rust near a joint that affects alignment
Cutting edges that are badly rounded or uneven
Do not try to file away deep pitting or straighten a blade unless the manufacturer specifically allows that repair. Removing too much metal can change the blade profile and create unsafe cutting behavior.
Product prices and availability are accurate as of the date/time indicated and are subject to change. Any price and availability information displayed on Amazon.com at the time of purchase will apply to the purchase of this product.
Remove light surface rust
For minor rust, use a stiff nylon brush or a rust-removing pad suitable for finished metal. Work along the blade surfaces and around the tooth gaps without forcing debris into the moving parts. A small brush can help loosen residue between teeth.
A mild rust remover may be appropriate, but check its label and the trimmer’s instructions first. Avoid soaking the entire blade assembly. Liquid can reach bearings, switches, motors, battery contacts, or other parts that are not designed to get wet.
After cleaning:
Wipe away the loosened rust and residue.
Dry the blades completely with a clean cloth.
Inspect both sides of the blade and the spaces between teeth.
Check that the blades move as intended by the manufacturer, without connecting power.
If rust remains in deep pits or the blade movement is rough, stop rather than forcing the trimmer to operate.
Product prices and availability are accurate as of the date/time indicated and are subject to change. Any price and availability information displayed on Amazon.com at the time of purchase will apply to the purchase of this product.
Lubricate the blades after cleaning
Once the blades are clean and dry, apply the lubricant specified by the manufacturer. Use a light, even coating on the blade surfaces and follow the product instructions for application and excess removal.
Lubrication helps reduce friction and protects the metal from moisture, but it does not repair pitting, restore a damaged cutting edge, or correct a bent blade. Avoid getting oil on battery contacts, electrical controls, or areas where it could attract large amounts of abrasive dirt.
Some manufacturers recommend lubricating before and after use, while others specify a particular product. The owner’s manual takes priority over general advice.
Check for setup or storage-related problems
Rust may return quickly if the underlying storage problem remains. Before putting the trimmer away, check that:
Plant sap and wet clippings have been removed from the blades.
The blades are dry before storage.
The tool is stored indoors or in a dry, ventilated location.
The tool is not left on a damp garage floor or against a wet wall.
A battery is removed from a cordless model when the manual recommends it.
Corded models are stored with the cord dry and undamaged.
Avoid sealing a damp trimmer inside a plastic bag or airtight container. Trapped condensation can accelerate corrosion. If the storage area is humid, improve ventilation and use a suitable protective coating recommended for the tool.
Decide whether to repair or replace the blade
Cleaning and lubrication are reasonable for light surface rust when the blade remains straight, secure, and mechanically sound. A replacement blade or blade assembly is more appropriate when corrosion has caused pitting, looseness, uneven tooth wear, or binding.
Not every hedge trimmer has a user-replaceable blade. Some models require a complete blade assembly, special adjustment procedures, or professional service. Match any replacement part by the exact model and part number in the manufacturer’s documentation; a blade that physically fits may still have the wrong tooth spacing, length, or mounting arrangement.
If the correct blade assembly costs close to a replacement trimmer, or if the motor, gearbox, and housing also show corrosion, replacing the tool may be more practical. Do not use the trimmer to “see if it still works” when the blades are visibly damaged or jammed.
If the trimmer still binds after cleaning
Remove the power source and inspect for:
Hardened sap or clippings between the teeth
A blade guard or sheath caught in the mechanism
Bent teeth contacting the opposing blade
Loose fasteners
Corrosion around the drive area
A gearbox or blade assembly that does not move smoothly by the prescribed method
Do not disassemble the gearbox or bypass a safety switch unless the manufacturer’s service instructions specifically cover that work. If the blade binds, makes unusual sounds, smells overheated, or trips protection repeatedly, stop using it and arrange qualified service or replace the affected assembly.
Prevent rust during future storage
The simplest routine is to clean plant residue from the blades after each use, dry them, apply the recommended lubricant, and install the blade sheath before storage. Inspect the blades before the next season and address small rust spots before they become pits.
For long-term storage, follow the manufacturer’s guidance for battery removal, blade protection, and lubricant. Keep the tool away from rain, irrigation spray, fertilizer, and other corrosive materials. A dry storage location and a properly fitted sheath usually do more to prevent recurring rust than heavy oil applied over dirt or moisture.
FAQ
Can I use a hedge trimmer with a little surface rust on the blades?
Do not use it until the blades have been cleaned, dried, lubricated as directed, and inspected. Light surface rust may be harmless after proper maintenance, but pitting, bent teeth, looseness, or binding calls for blade replacement or professional service.
What removes rust from hedge trimmer blades?
For light surface rust, a stiff nylon brush or suitable rust-removing pad may work. A manufacturer-approved rust remover can be used when appropriate, but avoid soaking the assembly and keep liquids away from the motor, bearings, controls, and battery contacts.
Should I oil hedge trimmer blades after removing rust?
Usually, a light coating of the lubricant specified by the manufacturer helps protect clean, dry blades. Apply it as directed and wipe off excess. Lubricant cannot repair deep pitting, damaged teeth, or a bent blade.
Can rusty hedge trimmer blades be sharpened?
Minor surface rust does not necessarily prevent sharpening, but deep corrosion, uneven teeth, cracks, or bends may make sharpening unsafe or ineffective. Use the manufacturer’s sharpening guidance or have the blade serviced by a qualified professional.
Why did my hedge trimmer blades rust while in storage?
Common causes include storing the tool wet, leaving plant sap or clippings on the blades, condensation in a humid area, and storing it without a protective lubricant or sheath. Cleaning and drying before storage can reduce recurrence.