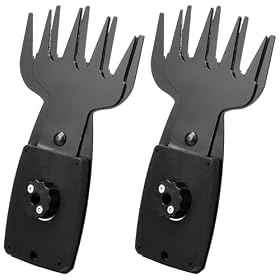
A replacement hedge trimmer blade must match the trimmer’s model and mounting design. Learn what to check before buying, when a blade can be replaced, and when replacing the entire tool makes more sense.
A replacement blade for a hedge trimmer must match the tool’s model, blade assembly, mounting points, and electrical or battery platform. Blade length and tooth spacing also affect cutting performance, but they cannot confirm compatibility by themselves. Before ordering, find the exact model number on the trimmer and compare the replacement part with the manufacturer’s parts information.
Check compatibility first
The safest way to choose a replacement blade is to search by the complete hedge trimmer model number, not just by blade length. The model number is usually printed on a label near the handle, battery compartment, motor housing, or cord connection.
Check these details:
Manufacturer and exact model: Similar-looking trimmers can use different blade assemblies.
Blade assembly design: Some replacements include the complete reciprocating blade set, while others are only individual components or repair parts.
Mounting points: Compare the hole pattern, fasteners, drive connection, and overall shape with the original blade.
Blade length: The replacement should be the length specified for the trimmer. A longer or shorter blade may not fit or operate safely.
Tooth spacing: The gap between teeth should suit the tool and the type of growth it is designed to cut.
Power platform: Corded, gas-powered, and battery trimmers generally require different assemblies. For cordless tools, confirm the exact tool model rather than relying only on the battery voltage.
If the listing does not clearly identify your trimmer model, contact the manufacturer or the seller before buying. Avoid assuming that two blades are interchangeable because they have the same length.
When should you replace the blade?
A blade may be ready for replacement when it is bent, cracked, badly corroded, missing teeth, or damaged around the mounting area. A blade that remains straight and intact may only need cleaning, lubrication, or professional sharpening, depending on the manufacturer’s instructions.
Replace the blade rather than trying to straighten a visibly bent or cracked assembly. Metal fatigue or hidden damage can cause the blade to fail during operation. Do not operate a trimmer with loose fasteners, damaged guards, or a blade that rubs against the housing.
Reduced cutting performance does not always mean the blade needs replacing. Dull teeth, plant material between the blades, a low battery, or a mechanical fault can produce similar symptoms.
Product prices and availability are accurate as of the date/time indicated and are subject to change. Any price and availability information displayed on Amazon.com at the time of purchase will apply to the purchase of this product.
Blade length and tooth spacing explained
Blade length affects how much hedge you can cut across in one pass and how easy the tool is to control. A longer blade can cover more area, but it may also add reach, weight, and leverage. The replacement must still match the trimmer’s specified blade length and balance.
Tooth spacing affects the size of branches the trimmer is intended to handle. Narrower spacing is generally suited to lighter, thinner growth, while wider spacing may accommodate larger stems when the trimmer manufacturer allows it. Tooth spacing does not turn a hedge trimmer into a branch cutter; never exceed the tool’s stated cutting capacity.
Product prices and availability are accurate as of the date/time indicated and are subject to change. Any price and availability information displayed on Amazon.com at the time of purchase will apply to the purchase of this product.
How to replace a hedge trimmer blade safely
Follow the manufacturer’s service instructions for the specific model. General precautions include:
Turn the trimmer off and disconnect it from power.
Unplug a corded tool. Remove the battery from a cordless tool and disconnect the spark-plug lead on a gas-powered model if the manufacturer’s instructions require it.
Wait for all moving parts to stop and allow hot components to cool.
Wear cut-resistant gloves when handling the blade, while keeping hands away from the cutting edges.
Photograph or note the position of covers, spacers, washers, and fasteners before disassembly.
Use the specified fasteners and tighten them according to the manufacturer’s instructions. Do not substitute random bolts or hardware.
Check that the blade moves freely by the method described in the manual, keeping the tool disconnected from power.
Reinstall guards and covers before reconnecting the battery, plug, or fuel system.
Test the trimmer briefly in a clear area, stopping immediately if the blade binds, vibrates unusually, makes grinding sounds, or contacts the housing.
If the replacement requires disassembling the drive mechanism or motor housing and the service information is unavailable, have the repair handled by a qualified service professional.
Product prices and availability are accurate as of the date/time indicated and are subject to change. Any price and availability information displayed on Amazon.com at the time of purchase will apply to the purchase of this product.
Clean and lubricate the new blade
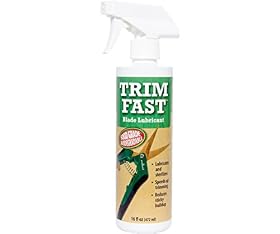
Remove plant debris and sap from the blade before applying lubricant. Use only the type of blade lubricant recommended by the manufacturer. Lubrication can reduce friction and corrosion, but it will not repair bent teeth, cracks, excessive wear, or a damaged drive assembly.
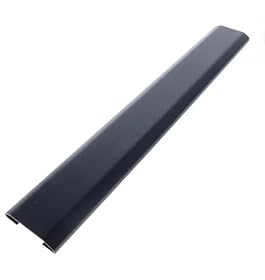
Store the trimmer with the blade sheath or guard installed. Keep the blade clean and dry, and avoid storing it where moisture can cause corrosion.
Troubleshooting after installation
The blade will not move
Remove the battery or disconnect power before inspecting the tool. Confirm that the blade is installed in the correct orientation and that no washer, spacer, or cover is mispositioned. Check for plant debris or a fastener that is too tight. If the blade still will not move freely, the drive mechanism may be damaged.
The trimmer vibrates or makes unusual noise
Stop using it immediately. Check for a bent blade, loose fasteners, missing spacers, damaged teeth, or contact between the blade and housing. Continued operation can worsen damage to the gearbox or motor.
The trimmer cuts poorly
Clean and lubricate the blade as directed, then inspect the teeth for dullness or damage. Confirm that the replacement has the correct tooth spacing and that the hedge growth is within the tool’s stated cutting capacity. A weak battery, damaged gearbox, or motor problem may also be responsible.
The blade does not fit
Do not force it or modify the mounting holes. Recheck the complete model number, blade length, mounting pattern, and whether the replacement is a complete blade assembly or only a component. Return an incompatible part and obtain the part specifically listed for the trimmer.
When replacing the entire hedge trimmer makes more sense
A replacement blade is usually reasonable when the trimmer’s motor, gearbox, housing, controls, and battery system remain in good condition. Replacing the complete tool may make more sense when the gearbox is noisy, the motor is failing, the housing or guard is damaged, compatible blades are no longer available, or the repair requires several expensive parts.
For a battery trimmer, compare the cost and availability of the blade with the condition of the battery and charger. A blade replacement will not solve a tool that has a failing battery, intermittent controls, or a damaged drive system.
FAQ
Can I use any hedge trimmer blade with my tool?
No. The blade must match the trimmer’s exact model and mounting design. Blade length and tooth spacing alone are not enough to confirm compatibility.
How do I find the correct replacement blade?
Locate the complete model number on the trimmer and search the manufacturer’s parts information for the specified blade assembly. Compare the mounting points and included hardware before ordering.
Can a hedge trimmer blade be sharpened instead of replaced?
A straight, intact blade may be cleanable or sharpenable if the manufacturer permits it. Replace blades that are cracked, bent, missing teeth, badly corroded, or damaged around the mounting area.
Should I lubricate a replacement hedge trimmer blade?
Use the blade lubricant and maintenance procedure specified by the manufacturer. Lubrication helps reduce friction and corrosion but cannot correct structural damage or a failing gearbox.