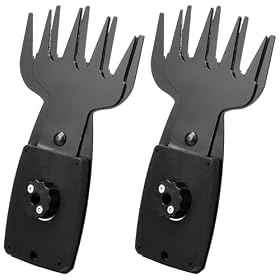
A hedge trimmer scabbard should cover the teeth completely and stay attached when the tool is moved or stored. Here is what to check before buying a replacement blade guard.
Scabbard that actually stays on in the garage
A hedge trimmer scabbard stays on when it fits the blade closely, covers the teeth fully, and uses a secure retention feature rather than relying on a loose friction fit. Before buying, match the scabbard to the blade’s usable length, width, thickness, and shape—not just the trimmer’s brand or advertised cutting length.
A secure scabbard protects the blade, nearby tools, storage surfaces, and anyone reaching into the garage. It also helps prevent accidental contact with sharp teeth while the trimmer is unplugged or the battery is removed.
What makes a hedge trimmer scabbard stay in place?
A close fit around the blade
The guard should slide over the blade without excessive side-to-side movement. A little clearance is necessary, but a guard that rattles, shifts, or can be pulled off with a light touch is unlikely to stay on during storage.
Compare these dimensions before ordering:
Covered blade length: The scabbard should extend over the entire toothed section.
Blade width: A guard that is too narrow may not seat fully; one that is too wide may slip off.
Blade thickness: Thick commercial-style blades may not fit guards designed for lighter trimmers.
Blade profile: Double-sided blades, single-sided blades, and blades with different spine shapes may require different guards.
The trimmer’s nominal cutting length is a useful starting point, but it is not always the same as the full blade length. Check the actual blade or the replacement-part instructions when possible.
Positive retention is better than friction alone
The most secure designs use a feature that resists sliding off, such as a molded lip, locking tab, clip, strap, or end stop. A simple open-ended sleeve can work if it fits tightly, but it is more likely to come loose when the trimmer is lifted, bumped, or stored vertically.
Avoid modifying the guard with drilled holes, cuts, or improvised fasteners. Alterations can weaken the cover and may leave sharp edges near the blade.
Full tooth coverage
A good scabbard should cover the cutting teeth from the tip to the point where the blade enters the trimmer housing. Partial coverage may protect only the exposed tip while leaving the most accessible teeth uncovered.
The guard does not need to cover the motor housing, but it should not stop short in a way that leaves sharp teeth exposed on the side or underside.
How to choose a replacement scabbard
Start with the original part number
If the original guard is missing or damaged, check the trimmer’s manual, parts diagram, or manufacturer’s replacement-parts listing. A model-specific scabbard is usually the least troublesome option because its dimensions and retention points are intended for that blade.
Do not assume that all trimmers from the same brand share one blade guard. Blade length, tooth spacing, housing shape, and blade thickness can vary between models.
Consider a universal guard only after measuring
Universal scabbards can be useful for older or discontinued trimmers, but the listing should provide meaningful dimensions and describe how the guard stays in place. Look for:
A stated fit range for blade length and width
A profile that matches your blade’s spine and teeth
A retention lip, strap, clip, or other anti-slip feature
Enough material thickness to resist splitting
Smooth edges that will not catch on clothing or damage the blade
A guard described only as “universal hedge trimmer cover” without fit dimensions is a risky purchase. Product photos may show a guard fitting one blade while offering little information about other shapes.
Choose material for the storage environment
Rigid plastic generally holds its shape better than thin, flexible material, especially when the trimmer is stored upright or moved frequently. Flexible covers can still work, but they need a reliable closure or snug fit to prevent sagging and sliding.
If the garage becomes very hot, very cold, or damp, follow the manufacturer’s storage guidance. Avoid storing the trimmer where the guard is constantly pressed against heavy objects, since deformation can reduce retention.
Product prices and availability are accurate as of the date/time indicated and are subject to change. Any price and availability information displayed on Amazon.com at the time of purchase will apply to the purchase of this product.
Check the fit before putting the trimmer away
Remove the battery or disconnect the power source before handling the blade. Wear gloves if the manufacturer recommends them, and keep fingers away from the cutting teeth.
Then:
Clean dirt, hedge debris, and excess lubricant from the blade.
Inspect the scabbard for cracks, splits, warped sections, or damaged clips.
Slide the guard on fully without forcing it.
Confirm that all cutting teeth are covered.
Hold the trimmer by a safe, non-blade area and gently tilt it in different directions.
Check that the scabbard does not slide off or expose the teeth.
Do not perform a violent shake test. If the cover moves during a gentle handling check, it is not secure enough for storage.
Product prices and availability are accurate as of the date/time indicated and are subject to change. Any price and availability information displayed on Amazon.com at the time of purchase will apply to the purchase of this product.
Why a scabbard may keep falling off
If a previously reliable guard no longer stays in place, inspect the likely causes in this order:
Debris or excess lubricant: Clean the inside of the cover and the blade. Thick buildup can prevent the guard from seating completely.
Wrong orientation: Some guards fit only when the blade spine or tooth side is aligned a particular way.
Bent or damaged blade: A bent spine or distorted blade can change the fit.
Cracked retention feature: A split lip, broken tab, or stretched strap may no longer hold the cover.
Heat deformation: Plastic can warp if stored near a heater or in intense sunlight.
Incorrect replacement: A guard made for a similar-looking blade may be too loose or too short.
A damaged scabbard should be replaced rather than secured with tape, wire, or makeshift ties. Those fixes can fail and may create an additional snag or contact hazard.
Storage practices that help the guard stay on
Store the trimmer with its power source removed, the blade clean, and the scabbard fully seated. Keep the tool where other equipment cannot catch the guard and pull it off. If the trimmer hangs on a wall, support it by the handle or an approved hanging point rather than by the scabbard.
Do not place heavy items on top of the blade cover. Avoid storing the trimmer with the blade pressed against a floor, shelf edge, or wall. Pressure can deform the guard and may also damage the blade.
For battery-powered models, follow the battery manufacturer’s storage and charging instructions. For corded models, unplug the trimmer before cleaning, inspecting, or fitting the scabbard.
When to replace the guard or the trimmer blade
Replace the scabbard when it is cracked, stretched, badly warped, missing a locking feature, or unable to cover the teeth securely. Replace or service the blade if it is bent, loose, heavily damaged, or no longer sits correctly in a properly matched guard.
If no replacement guard is available, compare the cost and availability of a compatible blade-and-guard assembly with the age and condition of the trimmer. A replacement unit may make more sense when the blade, guard, battery system, or safety components are all obsolete or damaged. Follow the manufacturer’s instructions, and have a qualified service professional handle repairs involving the motor, wiring, switches, or internal safety controls.
FAQ
Are hedge trimmer scabbards universal?
Some are marketed as universal, but fit is not guaranteed. Compare the covered blade length, width, thickness, and profile, and choose a guard with a stated fit range and a retention feature.
How tight should a hedge trimmer blade scabbard be?
It should slide on without excessive force, cover the entire toothed section, and resist coming off during gentle handling. It should not be so tight that it bends the blade or requires force to remove.
Can I use a scabbard that is longer than the hedge trimmer blade?
A small amount of extra length is usually less concerning than a guard that is too short, provided the blade cannot slide out and the cover stays secure. Confirm the manufacturer’s fit guidance before using it.
Can tape hold a loose hedge trimmer scabbard in place?
Tape is not a dependable replacement for a properly fitting guard. Replace a loose, cracked, or damaged scabbard with a compatible part instead.