Hedge trimmer blades usually chew through branches because they are dull, damaged, dirty, poorly lubricated, or being used on material thicker than the tool can handle. Start with the blade condition and work through these checks before replacing the trimmer.
Hedge trimmer blades that chew, snag, or crush branches instead of cutting cleanly usually have a blade problem, not an immediate motor failure. Unplug the trimmer or remove its battery before inspecting it, then check the blades for dullness, damage, debris, and poor lubrication. Also confirm that the branches are within the trimmer’s cutting capacity and that the tool has enough power.
Check the blades first
Look for dull or damaged cutting edges
Clean hedge trimmer blades should have distinct cutting edges that pass one another closely. If the edges look rounded, chipped, bent, or heavily worn, the blades may grab and crush branches rather than shear them.
Gaps between sections of the moving and stationary blades
A small amount of wear may be serviceable if the manufacturer allows sharpening. Do not try to reshape badly bent teeth by force. A damaged blade can bind, create vibration, and become unsafe.
Check for movement and alignment
With the battery removed or the tool unplugged, gently inspect whether the blade assembly appears loose or misaligned. Loose fasteners, damaged blade guides, or a bent blade can prevent the cutting surfaces from meeting correctly.
Do not operate the trimmer with a loose blade assembly. Tighten only fasteners identified in the owner’s manual, using the specified procedure. If the blade is bent or the drive mechanism is visibly damaged, replacement or professional service is usually the safer choice.
Remove packed debris
Small leaves, sap, twigs, and hedge clippings can pack between the teeth. This reduces the gap needed for branches to enter and can stop the blades from sliding past each other properly.
After disconnecting power:
Brush loose debris away from the blade area.
Use a suitable wooden or plastic tool to loosen packed material; keep your hands away from the teeth.
Wipe the blades clean with a cloth.
Check that the blades can move freely without forcing them.
Never clear a jam while the battery is installed or the power cord is connected. If the blades remain locked after debris is removed, do not keep pressing the trigger. The obstruction may be in the gearbox or drive system.
Product prices and availability are accurate as of the date/time indicated and are subject to change. Any price and availability information displayed on Amazon.com at the time of purchase will apply to the purchase of this product.
Clean and lubricate the blades
Dry, dirty blades create friction and can make a trimmer feel as if it is cutting poorly even when the edges are still usable. Sap is especially troublesome because it can make the teeth sticky and prevent smooth movement.
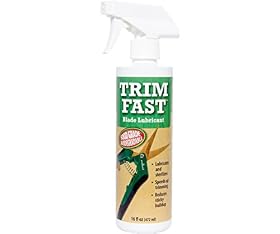
Use the cleaning and blade lubricant specified by the manufacturer. Apply lubricant to the blade surfaces and moving contact points according to the manual, then briefly run the tool only if the manufacturer’s instructions permit it. Wipe away excess lubricant so it does not attract more dust and clippings.
Do not substitute household oils, solvents, or penetrating sprays unless the manufacturer specifically approves them. The wrong product can damage seals, attract abrasive debris, or create a slip hazard.
Product prices and availability are accurate as of the date/time indicated and are subject to change. Any price and availability information displayed on Amazon.com at the time of purchase will apply to the purchase of this product.
Make sure the branches are within the trimmer’s capacity
A hedge trimmer is designed for repeated trimming of growth within its stated maximum cutting diameter. It is not a substitute for a chainsaw, pruning saw, or loppers.
Chewing is more likely when you try to cut:
Branches thicker than the tool’s rated capacity
Hard, dry, or dead wood
Very flexible stems that move away from the teeth
Several dense branches at once
Wood at an awkward angle near the end of the blade
Use a pruning saw or loppers for oversized branches, then return to the hedge trimmer for the smaller growth. Do not force the blade through a branch by twisting the tool or pushing harder. That can stall the motor and damage the drive mechanism.
Product prices and availability are accurate as of the date/time indicated and are subject to change. Any price and availability information displayed on Amazon.com at the time of purchase will apply to the purchase of this product.
Use the correct cutting motion
For ordinary hedge trimming, let the blade teeth do the work. Keep the blade moving steadily along the hedge rather than stopping with a thick branch trapped between the teeth.
Helpful technique changes include:
Approach thicker stems with the wider part of the blade when practical.
Avoid cutting at the extreme tip if the tool is prone to snagging there.
Use smooth passes instead of repeatedly stabbing at one branch.
Support or remove loose branches that are bending away from the blade.
Do not twist the trimmer sideways while a branch is engaged.
If the blades cut well on thin growth but chew on larger stems, the tool may simply be reaching its practical limit.
Check power and operating conditions
Low power can make the blades move slowly, reducing their ability to shear branches cleanly. For cordless models, fully charge the battery and check that it is seated correctly. A battery that is unusually hot, swollen, damaged, or unable to hold a charge should not be used.
For corded models, check that the plug and extension cord are suitable for the tool and that the connection is secure. Avoid undersized, excessively long, or damaged extension cords. Follow the manufacturer’s cord requirements.
If the motor slows significantly during light trimming, or the tool stops and starts without a branch jam, allow it to cool and check for overload protection. Repeated overheating, burning smells, unusual sparking, or a trigger that behaves erratically requires service. Disconnect power and do not open the motor or electrical housing unless you are qualified and the manufacturer permits it.
When sharpening or replacement makes sense
Sharpening may be appropriate when the blade edges are uniformly dull and the owner’s manual provides a permitted sharpening method. Some blade assemblies are intended to be replaced rather than sharpened. Follow the tool’s instructions instead of removing metal indiscriminately; changing the tooth profile or clearance can make cutting worse.
Replace the blade assembly when it is bent, cracked, badly chipped, deeply corroded, excessively worn, or no longer aligns correctly. Match the replacement to the exact trimmer model and version. Similar-looking blades are not necessarily compatible, and an incorrect blade can create a serious safety risk.
A replacement trimmer may be reasonable when the blade, gearbox, and motor all show substantial wear, or when the repair cost and parts availability make repair impractical. If the blades are clean, lubricated, sharp, correctly aligned, and being used within their capacity but still chew on light branches, have the tool inspected before buying another blade.
Quick diagnosis
Chews every branch: Inspect dullness, alignment, lubrication, and power first.
Chews only thick branches: The branches may exceed the trimmer’s practical cutting capacity.
Started after hitting a hard branch: Look for bent or chipped teeth and blade misalignment.
Works briefly, then slows: Check for packed debris, overheating, battery condition, or overload protection.
Makes grinding or rattling sounds: Stop using it and arrange service; the drive or gearbox may be damaged.
Cuts poorly after storage: Clean off rust and residue, lubricate as directed, and inspect for corrosion or seized movement.
Disconnect the tool and contact the manufacturer or a qualified repair professional if you find damaged wiring, a cracked housing, persistent gearbox noise, uncontrolled blade movement, or repeated electrical faults.
FAQ
Can hedge trimmer blades be sharpened?
Sometimes. Follow the owner’s manual because some blades are designed for replacement rather than sharpening. Uniformly dull edges may be serviceable, but bent, cracked, badly chipped, or severely worn blades should generally be replaced.
Why does my hedge trimmer cut small branches but chew larger ones?
The larger branches may be near or beyond the tool’s practical cutting capacity, especially if they are hard or dry. Use loppers or a pruning saw for oversized wood instead of forcing the hedge trimmer.
How often should hedge trimmer blades be lubricated?
Lubricate them at the interval and with the product specified by the manufacturer. Cleaning and lubrication are also appropriate after heavy use, cutting sap-covered growth, or before storage if the manual recommends it.
Is it safe to clear a jam with the battery installed?
No. Remove the battery or disconnect the power cord before clearing debris or inspecting the blade. Keep hands away from the teeth and use a nonmetallic tool for stubborn clippings.
Why is my hedge trimmer vibrating and cutting poorly?
A bent or damaged blade, loose fastener, packed debris, or drive-system problem can cause vibration and poor cutting. Stop using the trimmer, disconnect power, and inspect it without touching moving parts.