A spare hedge trimmer blade set can prevent downtime during peak growth, but compatibility matters more than blade length alone. Check the exact trimmer model, blade assembly, tooth spacing, drive connection, and manufacturer instructions before buying.
Buying a spare set of blades before peak season
Buying a spare set of hedge trimmer blades before peak season can save a job when the installed blade becomes damaged, dull, or difficult to clean. The important part is choosing a blade assembly that matches your exact trimmer—not simply one with a similar length or appearance.
Why buy a spare blade set early?
Hedges often need the most attention when growth is fastest. If the blade is bent, badly worn, or damaged by a hidden object, having a compatible replacement lets you resume work without waiting for a part to arrive.
A spare can also be useful when:
The current blade needs professional sharpening or inspection
You maintain multiple properties and cannot afford extended downtime
The trimmer is used around branches that may exceed its intended cutting capacity
You want to keep one blade clean and lubricated while the other is installed
The manufacturer may discontinue parts for an older trimmer
A replacement blade is not a substitute for using the trimmer within its rated cutting capacity. Forcing the tool through oversized, hard, or embedded material can damage the blade drive, gearbox, or motor.
Check compatibility before ordering
The exact trimmer model is the most reliable starting point. Find the model and type or product number on the tool’s label, housing, battery compartment, or original documentation. Then confirm the replacement part against the manufacturer’s parts list or fitment information.
Check these details before buying:
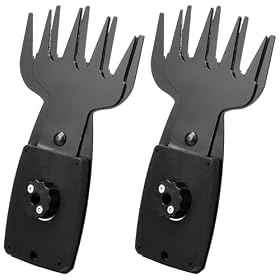
Blade assembly and mounting points
Some replacements are complete blade assemblies, while others may be individual components intended for repair. Confirm what is included and whether the part attaches directly to your trimmer.
The mounting holes, guide arrangement, drive connection, and fasteners must match. A blade that looks correct but does not align precisely can create excessive vibration or fail to move correctly.
Blade length
Blade length affects the amount of hedge you can cut in one pass, but it does not determine compatibility by itself. Do not assume a blade of the same length will fit your trimmer.
If you are choosing between an exact replacement and a different length, use the manufacturer’s approved parts information. An unsuitable blade can alter balance, clearance, or the load placed on the drive system.
Tooth spacing and cutting capacity
Tooth spacing affects the size of material the blade is designed to handle. Match the replacement to the trimmer and the type of hedge you normally maintain.
A blade with a different tooth pattern or spacing may not be approved for your tool, even if it physically attaches. It may also produce a different finish or encourage attempts to cut material beyond the trimmer’s capability.
Power source and model family
Battery, corded, and gas-powered trimmers may use different blade assemblies. Even within one brand, blade parts may vary between generations or between similar-looking models.
Do not rely only on the brand name. Verify the complete model designation and any listed revision or type number.
Genuine versus compatible replacements
A genuine replacement is listed by the trimmer manufacturer for the exact model. A compatible replacement may fit, but its listing should clearly identify the models it supports and describe the mounting details.
For a high-use tool, a clearly documented part is generally a better choice than the cheapest blade with vague fitment information. If the listing does not identify your exact model, treat compatibility as unconfirmed.
Product prices and availability are accurate as of the date/time indicated and are subject to change. Any price and availability information displayed on Amazon.com at the time of purchase will apply to the purchase of this product.
Inspect the current blade before deciding
A replacement may be appropriate if the current blade has:
Bent or cracked teeth
A visibly warped blade rail
Deep damage from a stone, wire, or other hard object
Excessive corrosion or pitting
Teeth that remain damaged after proper sharpening
Unusual movement, binding, or vibration when the tool is operated
Dull cutting alone does not always require a new blade. Depending on the manufacturer’s instructions, a serviceable blade may be sharpened or replaced by a qualified repair shop. Do not sharpen a blade if it is cracked, bent, or otherwise structurally damaged.
If the blade appears sound but the teeth are not cutting properly, first check cleaning, lubrication, and the trimmer’s operating technique. A damaged gearbox or blade drive can produce symptoms that a new blade will not fix.
Product prices and availability are accurate as of the date/time indicated and are subject to change. Any price and availability information displayed on Amazon.com at the time of purchase will apply to the purchase of this product.
What else to buy with a spare blade
A few maintenance items can make the spare more useful:
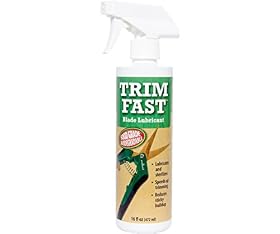
Blade lubricant approved for the trimmer
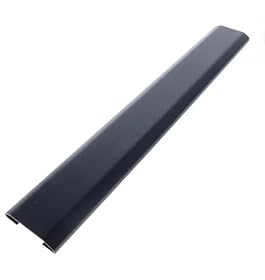
A blade sheath or protective cover for storage and transport
Replacement fasteners if the manufacturer specifies one-time-use hardware
A suitable cleaning brush or cloth
The correct battery or charger only if your existing power system is incomplete
Use only lubricant recommended in the owner’s manual. Keep lubricant away from the battery contacts, motor openings, and other areas where it could attract debris or create an electrical problem.
Product prices and availability are accurate as of the date/time indicated and are subject to change. Any price and availability information displayed on Amazon.com at the time of purchase will apply to the purchase of this product.
Store the spare blade safely
Keep the replacement in its packaging or under a proper blade sheath. Store it in a dry location away from fertilizer, pool chemicals, and other corrosive materials. Avoid placing heavy tools on top of the blade, which can bend the rail or teeth.
Before peak season, compare the spare with the installed blade and confirm that the mounting hardware and documentation are present. This is much easier to resolve before the trimmer is needed urgently.
Do not transport or install an uncovered blade. Wear cut-resistant gloves where appropriate, keep the cutting edges pointed away from your body, and follow the trimmer manufacturer’s instructions for removing the battery, disconnecting the plug, or stopping and cooling a gas-powered unit before service.
A quick pre-season blade check
Before putting the trimmer into regular use:
Identify the exact trimmer model and confirm the replacement part number or fitment.
Inspect the installed blade for cracks, bends, missing teeth, and heavy corrosion.
Clean debris from between the teeth and around the blade rail.
Check that fasteners are present and secure according to the manual.
Apply the specified blade lubricant.
Check that the blade moves freely by hand only after the power source has been fully isolated and the manual permits this check.
Run the trimmer briefly in a safe area and stop if it produces abnormal vibration, grinding, smoke, or binding.
If the replacement blade does not align, moves unevenly, or requires force to install, stop rather than modifying the part. Contact the manufacturer or a qualified service professional.
When a replacement blade is not the right fix
A new blade is unlikely to solve a problem caused by a worn gearbox, damaged blade drive, failed motor, loose housing, or electrical fault. Stop using the trimmer if it sparks, smells overheated, repeatedly trips protection, or vibrates severely.
For an older trimmer, compare the cost and availability of the blade with the condition of the entire tool. If several major parts are worn or replacement blades are no longer reliably available, replacing the trimmer may be more practical than stocking a spare part that does not address the underlying problem.
The best spare blade is the one confirmed for your exact model, stored safely, and ready before the hedge is growing fastest. Compatibility and correct installation matter more than choosing the longest or least expensive blade.
FAQ
How do I know which replacement hedge trimmer blade to buy?
Use the trimmer’s complete model and type number to check the manufacturer’s parts list or fitment information. Confirm the blade assembly, mounting points, length, tooth spacing, and included hardware before ordering.
Can I use a longer blade on my hedge trimmer?
Only if the manufacturer lists that blade as approved for your exact model. Blade length alone does not confirm compatibility, and an unsuitable blade can affect balance, clearance, and drive-system load.
Should I replace or sharpen a hedge trimmer blade?
A sound, moderately dull blade may be serviceable through sharpening if the manufacturer permits it. Replace a blade that is cracked, bent, badly corroded, or damaged after striking a hard object.
How should I store a spare hedge trimmer blade?
Keep it dry, protected by its packaging or a blade sheath, and away from corrosive chemicals. Store it where heavy tools cannot bend the blade rail or teeth.